


Visible mending is the art of repairing a garment while enhancing it. Sashiko stitching is part of the Japanese wabi-sabi philosophy, which celebrates the passage of time and transforms fabric wear into an epic stage of its life cycle rather than its end. Each piece thus becomes a unique textile artwork.
Whether you want to reinforce a weakened fabric or simply add a personal touch to a garment, these techniques allow you to express your creativity while extending the life of your jeans. I particularly enjoy exploring Sashiko stitching and the variety of patterns it offers for creative repairs.
I've gathered six basic Sashiko stitch patterns here, available for free download and printing. You'll also find an introduction to the necessary materials and an explanation of the basic Sashiko stitch, also called the "running stitch" in English. Finally, I'll explain how to sew and apply a patch to your jeans.
List of my favorite tools

Visible mending is accessible, and you can start exploring with what you have on hand, but the right tools will make your experience more enjoyable and ensure a neat and durable result.
Recommended basic materials:
- Sashiko Thread (Amazon link)
- Sashiko needles (Amazon link)
- Sashiko thimble (Amazon link)
- Taylor chalk (Amazon link)
- Transparent graded ruler (Amazon link)
- Sewing snip (Amazon link)
- Sewing scissors (Amazon link)
- Recycled denim square (4''x4'')
👉 For more info on each tool, check out this article: Click here
Marking the Grid


Grab your ruler and fabric marking pencil. I recommend starting by drawing the center lines, then adding vertical and horizontal lines spaced 1 cm apart. Leave a margin of at least 1.5 cm all around the square.
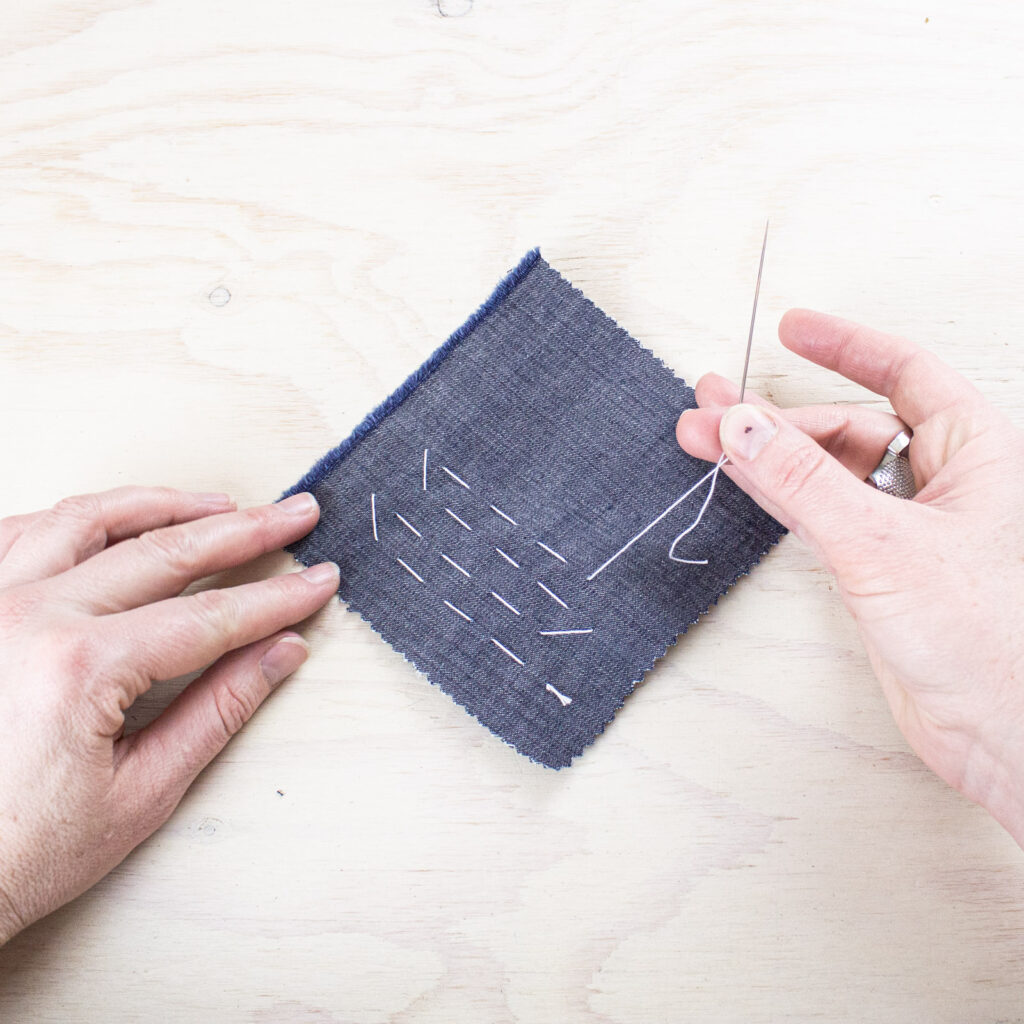
Threading the Needle


Cut about an arm’s length of thread, then thread it through the eye of the needle while holding the end between your fingers. You can use a needle threader if needed.
Two ways to thread the needle:
- Single thread : Tie a knot at the end of the longer thread. The short end should be loose and about 1/3 of the total length.
- Double thread: Both threads are of equal length and tied together at the end.


💡 A single thread is preferable: it allows you to undo a few stitches easily without cutting the thread. The double thread is only if your thread is not thick enough.
How to hold the needle?


I used to be intimidated by long Sashiko needles and Sashiko thimbles. But honestly, it’s worth taking the time to get used to them because they help achieve much more consistent stitches.
That said, I use this technique when embroidering on a single layer of fabric. If I'm working on denim, I prefer embroidering flat with a conventional thimble.
Explore both approaches and see which works best for you!
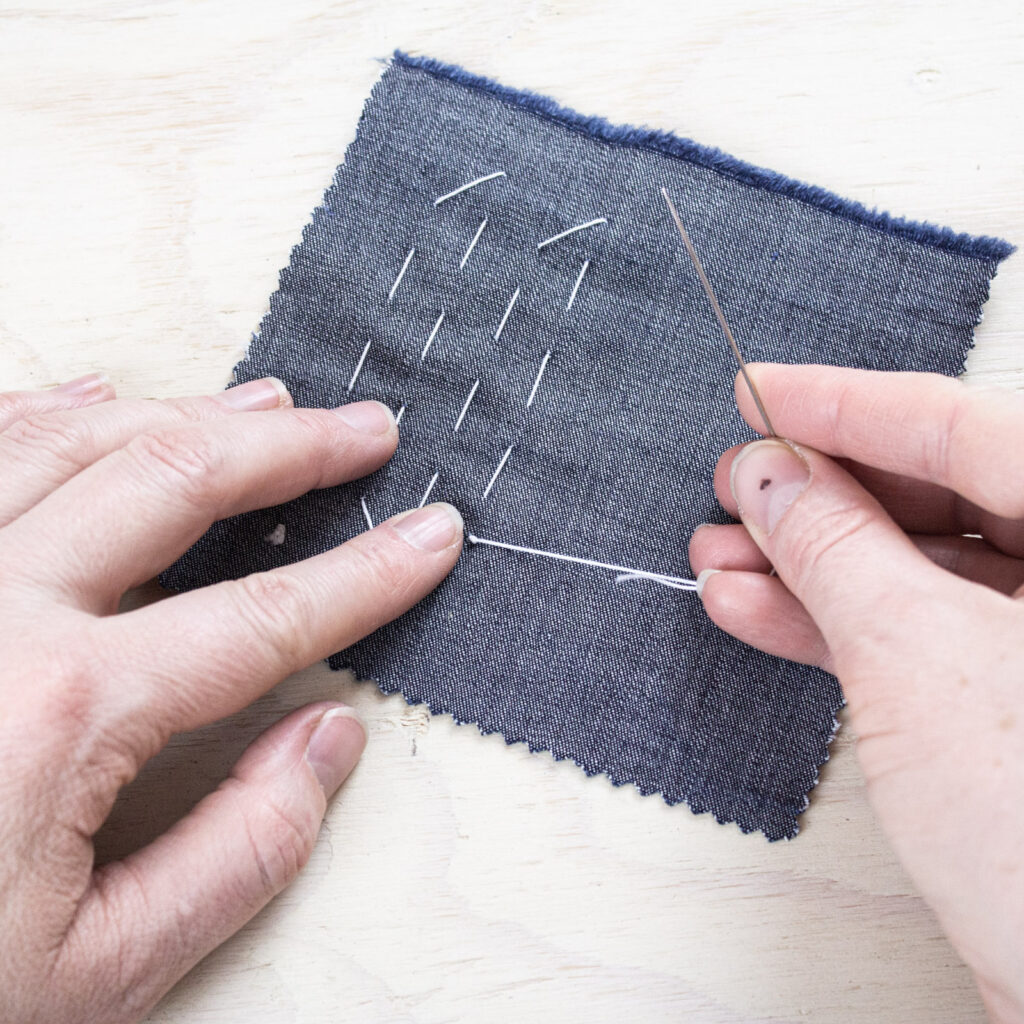
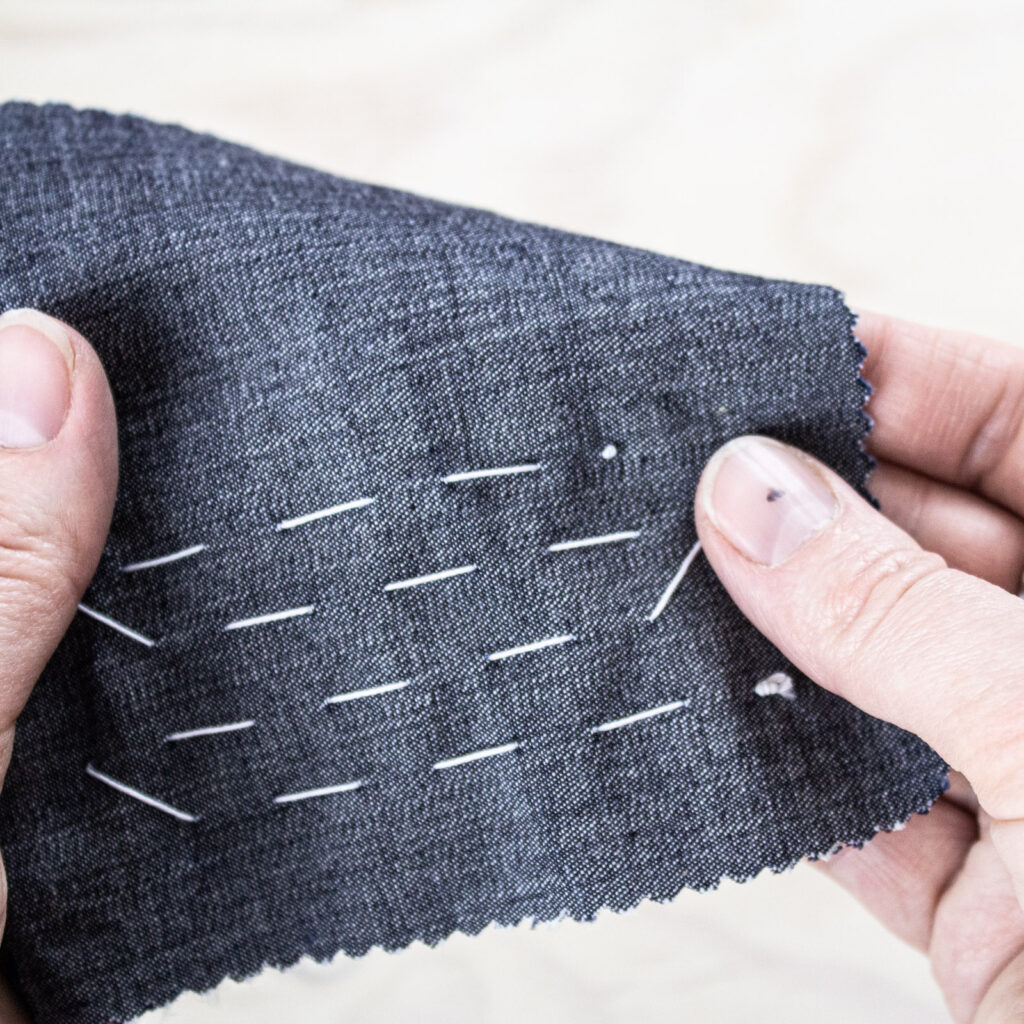
The Running Stitch (Sashiko)
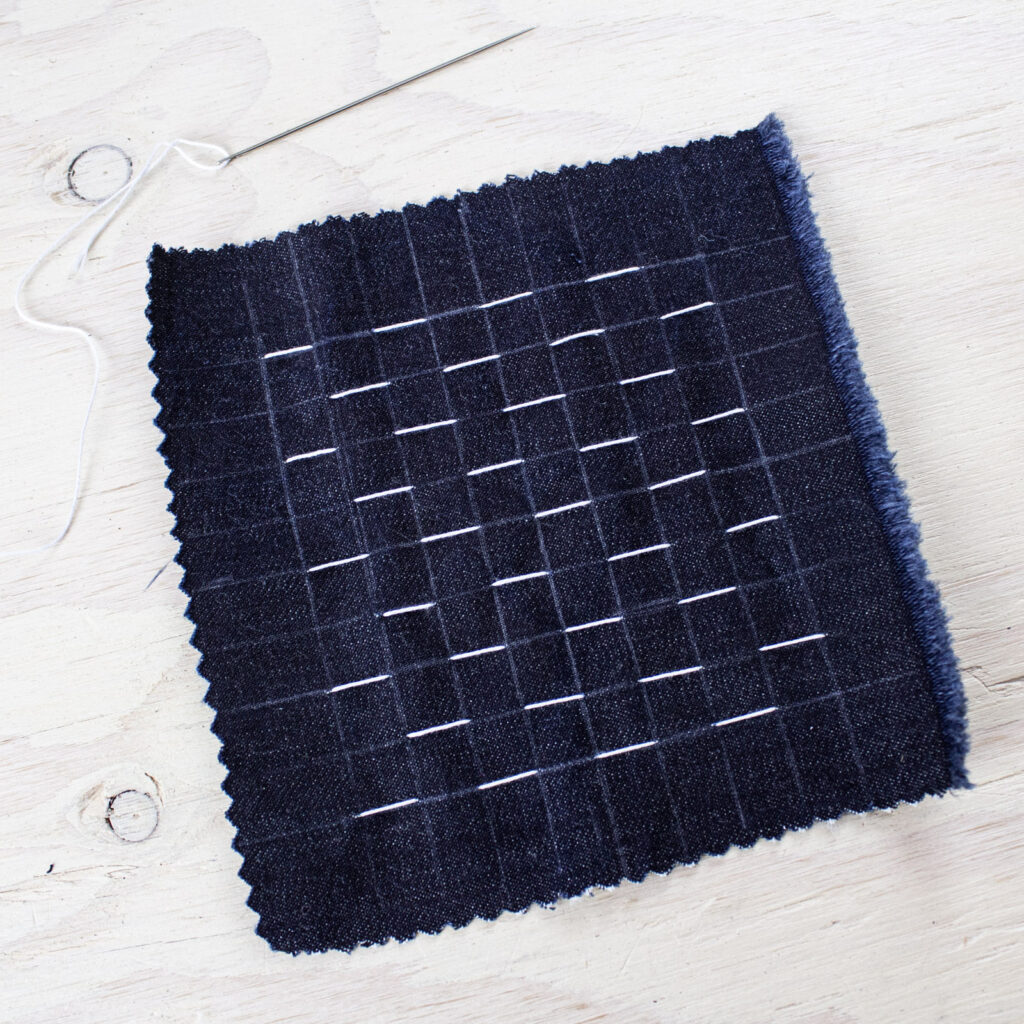
The running stitch is the Sashiko stitch. It is also called a straight stitch and is the oldest, simplest, and fastest stitch. Used by various cultures worldwide, it is quick but not necessarily the strongest when joining two fabric pieces. It can be used as a temporary basting stitch or as a decorative topstitch. With repeated stitching—whether horizontal, vertical, or diagonal—you can create an infinite number of patterns.


How to sew the running stitch:
- Insert the needle from the back of the fabric.
- Pass the needle through the fabric without pulling it out completely.
- Point the needle in the direction of the stitch and push it forward again.
- Repeat the process as many times as your needle length allows.
- Pull the thread through and continue.


When you finish a row, reinsert the needle slightly offset to start the next row.
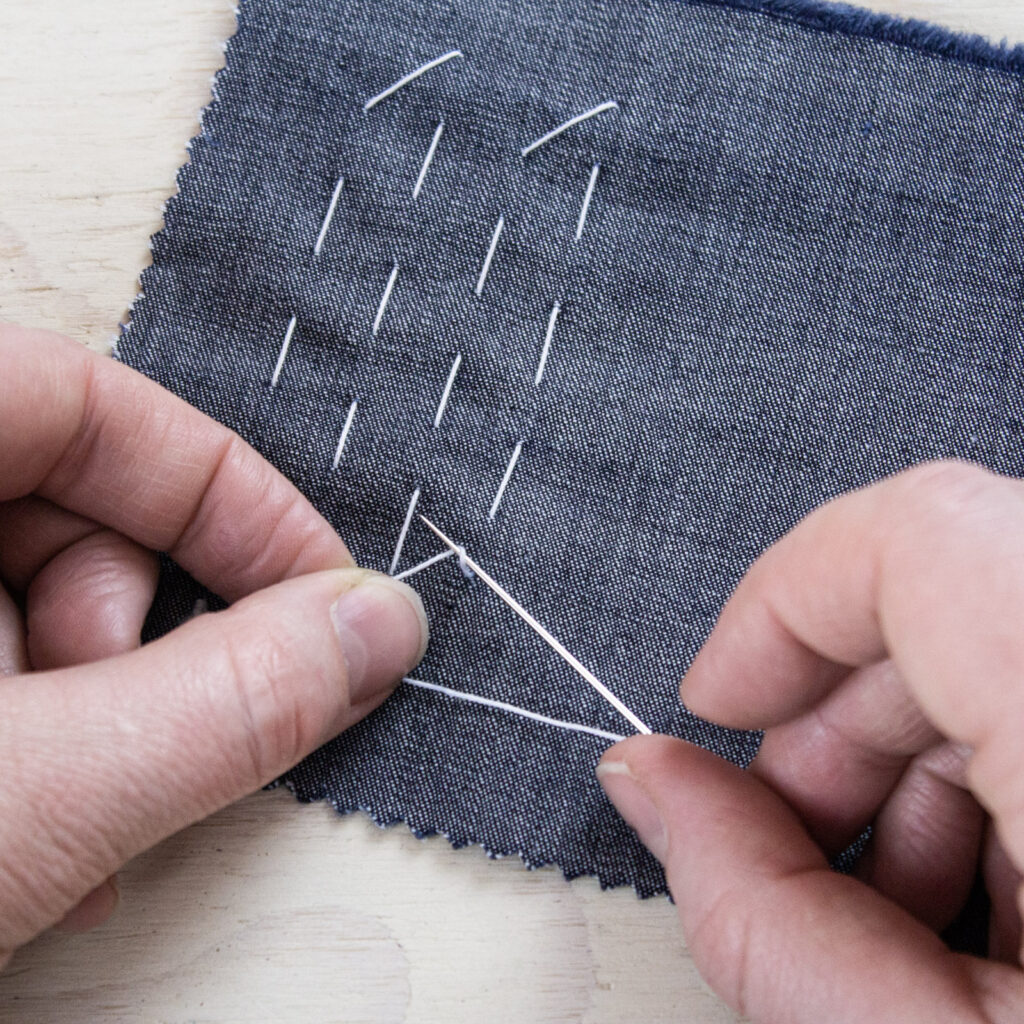
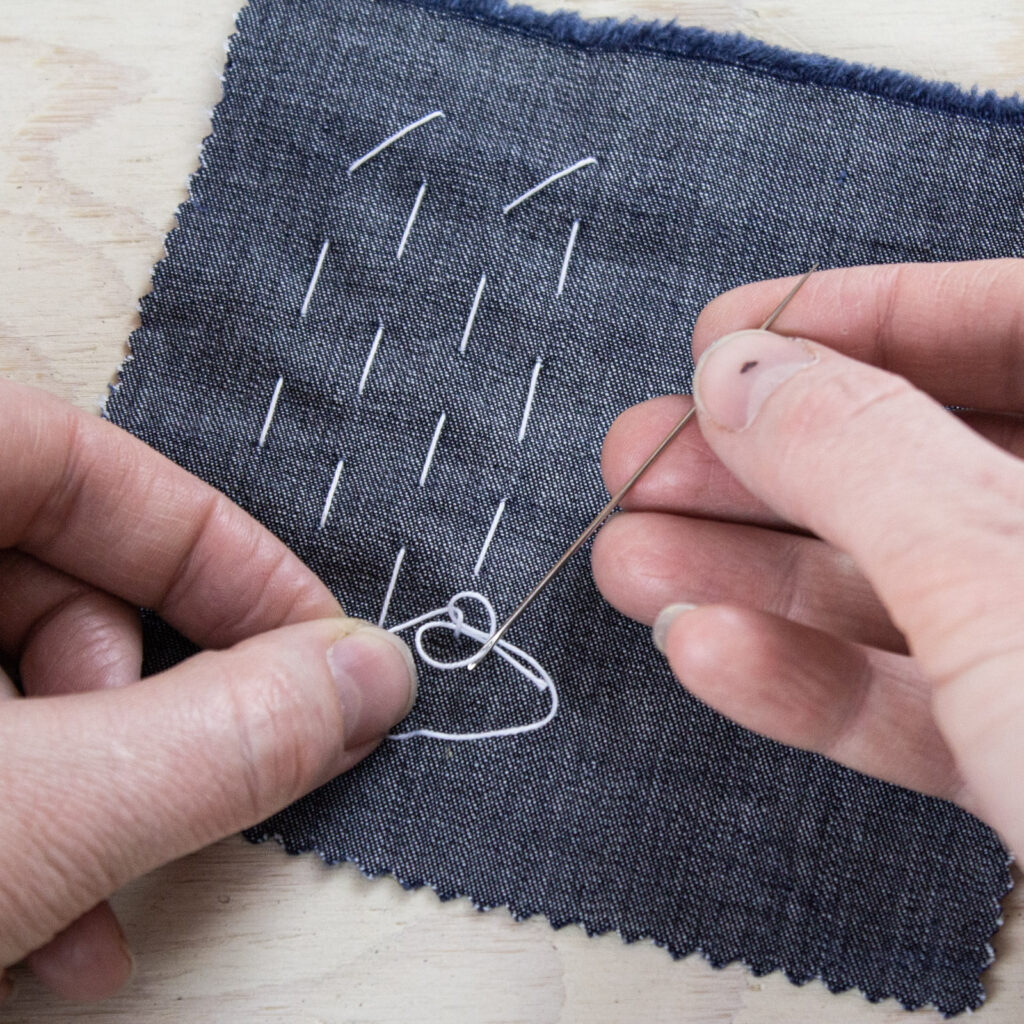
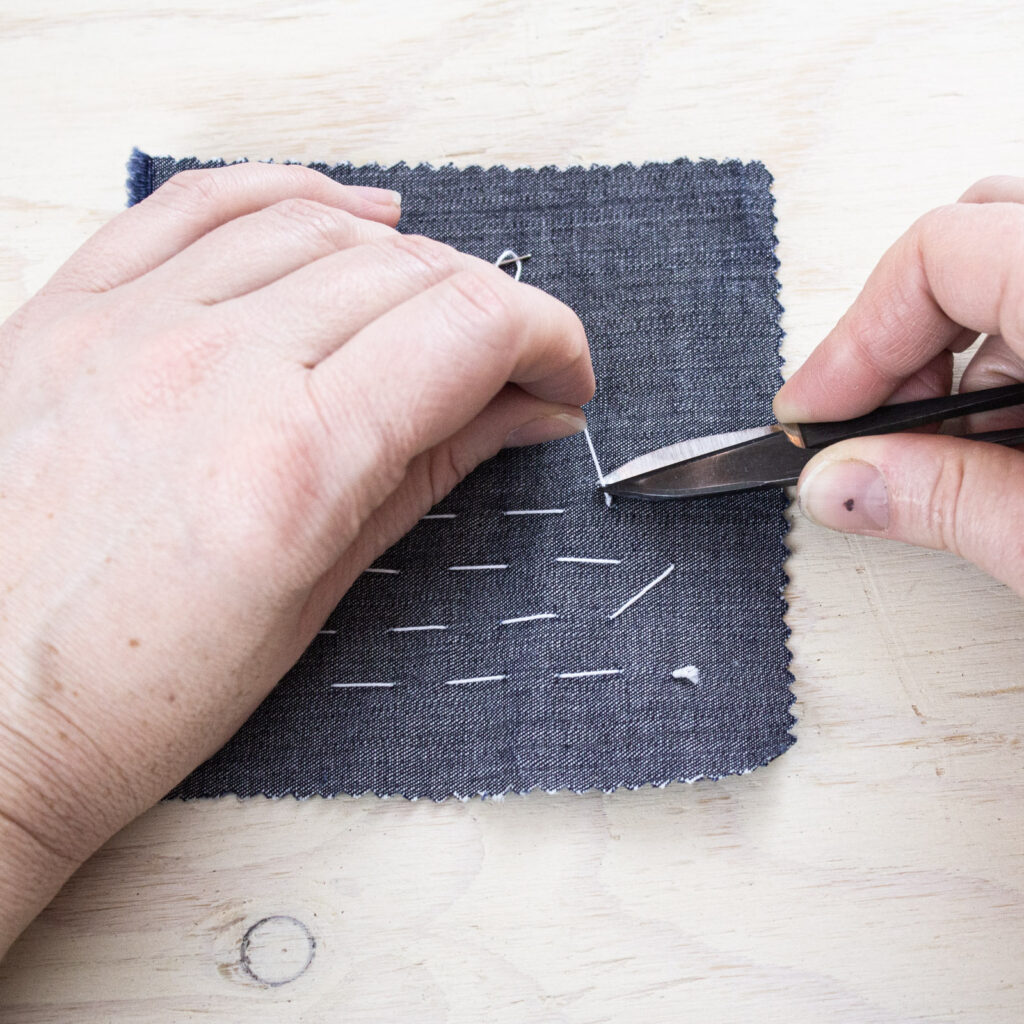
What to Do When the Thread Runs Out?

When your thread is almost finished, tie a knot before cutting it. The quilter’s knot is an excellent option:
- Wrap the thread once around the needle.
- Pass the needle through the loop of the thread.
- Slide the knot as close to the fabric as possible with your finger.
- Cut the thread using your thread snips.
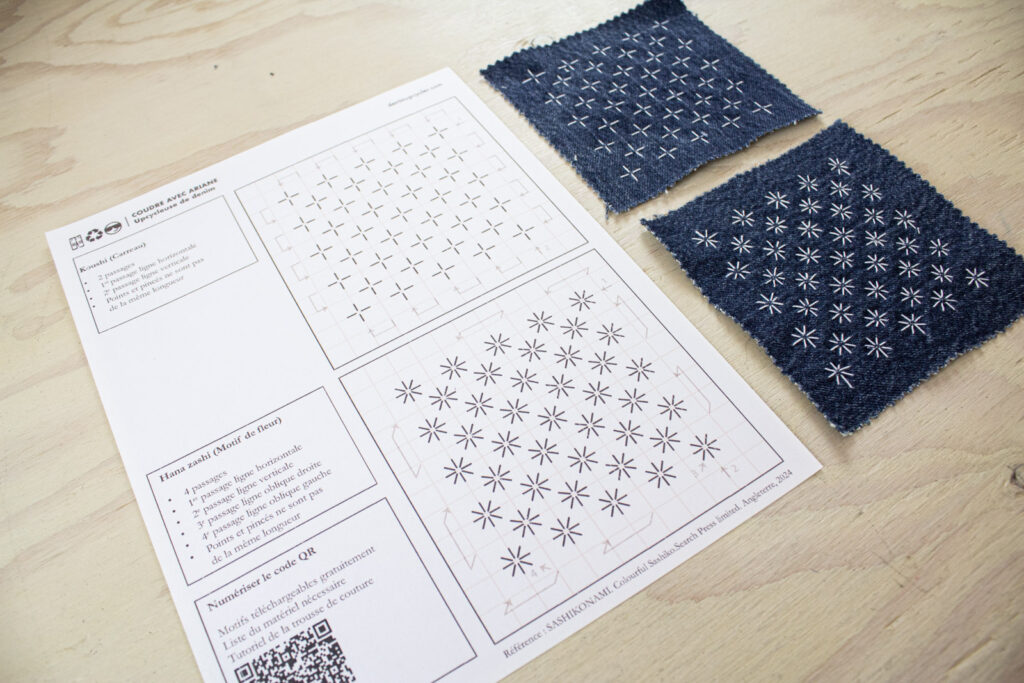
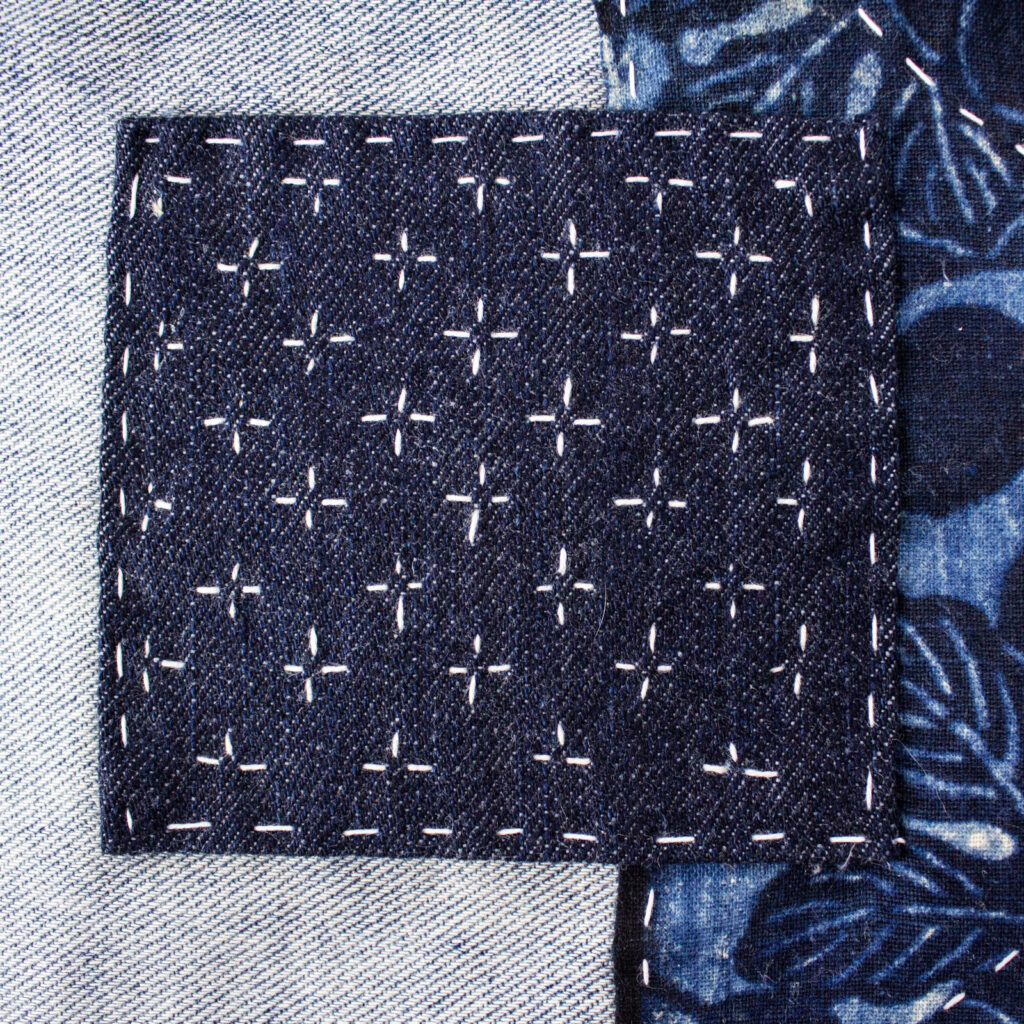
The 6 basic Sashiko patterns (According to me)

Sashiko is an embroidery technique that uses straight, repetitive stitches to create geometric patterns. These patterns are not only decorative but also reinforce the fabric and add a unique touch.
- Tate-jima (vertical lign)
- Kome Zashi (Rice Grain Pattern)
- Diagonal Line
- • Kome Zashi (Rice Grain Pattern, Variation 1)
- Koushi (Check Pattern)
- Hana Zashi (Flower Pattern)
Download the pattern templates for free!
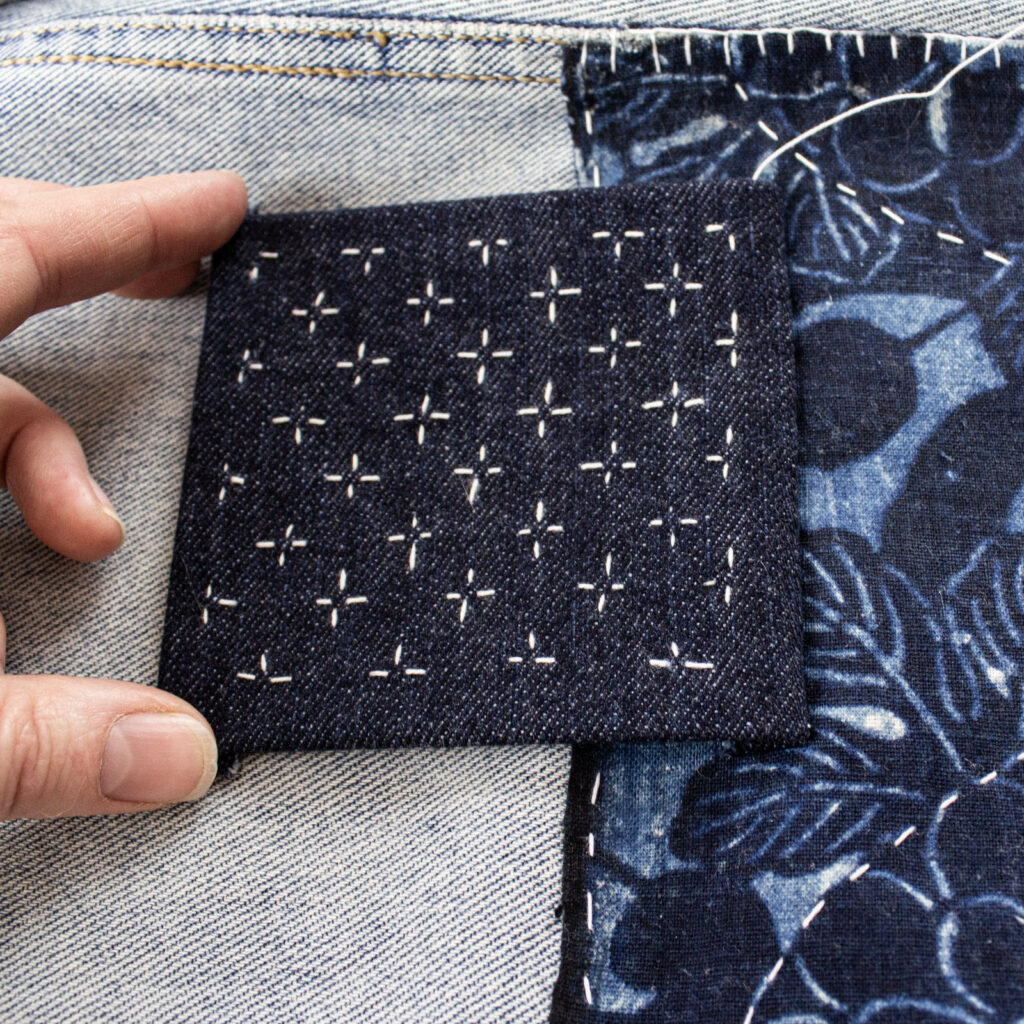
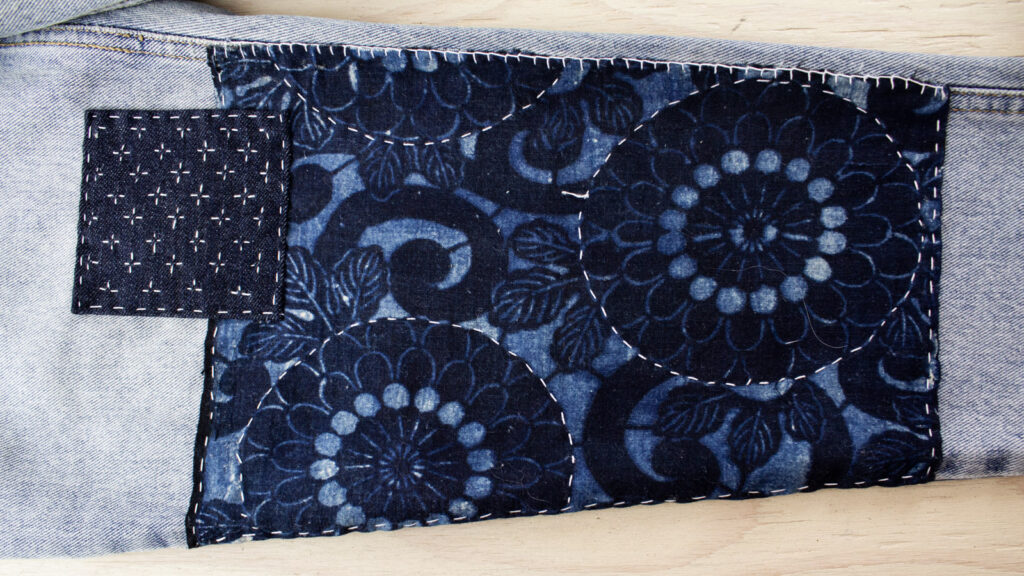
Sewing the embroidered patch
You can attach your embroidered patch in two ways:
- Leaving the edges frayed for a raw effect.
- Folding the edges inward (1 cm) for a cleaner finish. In this case, press them with an iron before pinning.


If you fold the seam allowances inward, you can reduce the thickness at the corners using scissors.


I like to sew one of the four sides right sides together using a running stitch. Then, I flip the patch right side out.


I pin the piece, placing the pins perpendicular to the seam, then secure everything with a running stitch all around.
My favorite pins for denim (Amazon link)

Practice: Make a Hand-Sewn Sewing Kit

Creating a fully hand-stitched sewing kit with a Sashiko pattern is a great way to practice while making something useful.
Conclusion
Visible mending is more than just repair—it’s a creative and committed approach to fashion and a more sustainable pace of consumption.
👉 To shop for your visible mending kit, click here: Click here
Share your creations with me on Instagram or Facebook Questions? Drop them in the comments!
Looking forward to sewing with you xo.
One reply on “SASHIKO & RACCOMMODAGE VISIBLE | Guide pratique pour débuter“